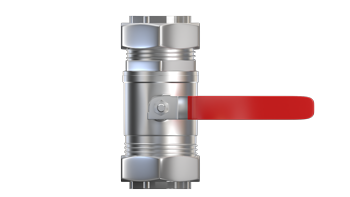
Fitting
- Place an insert adaptor into the equipment to check the depth of pipe stop (do not fit o rings onto adaptor at this stage)!
If the f1. Place an insert adaptor into the equipment to check the depth of pipe stop (do not fit o rings onto adaptor at this stage)! - If the flat face of insert adaptor is flush with the threads on equipment it will not require cutting (go to section 5).
- If the chamfered edge of the insert adaptor protrudes the equipment, simply cut the insert adaptor on the bottom groove with a suitable tool and deburr to removed any sharp edges as this may damage the o rings that are to be fitted.
- Push both insert adaptors into the equipment until they are flush with threads on equipment
- Slide the compression nuts provided with the equipment over the stub adaptors.


Example of insert adaptor after following section 3 above
- Ensure to remove any debris from within the grooves after cutting.
- Push o rings into the clean grooves of insert adaptors.
- Lubricate the o rings with the silicone grease provided – failure to lubricate the o rings could result in twisting and subsequent leakages.
- Place the fibre washers provided between each flat face of the insert adaptors and the stub adaptors, then tighten compression nuts onto the equipment.
- If retrofitting clevercoupler to existing system pipework, simply place your preferred valves or fittings onto each stub adaptor and offer the completed section up to the pipework that it is to be installed on, this will allow you to mark your cutting points on the pipe and eliminate any guesswork when it comes to installing the equipment with the valves or fittings installed.
- After cutting the pipe on the marks you have just made, connect your chosen valves or fittings to the pipework.
- Remove the stub adaptors and compression nuts, connect these to the valves or fittings that you have previously connected to the pipework, then slide in the equipment along with the fibre washers provided and tighten both nuts to create a watertight seal.


KEY FEATURES
- Triple sealing insert adaptor (2 per kit for CC22KIT & CC28KIT / 3 per kit for CC22KIT3P & CC28KIT3P)
- WRAS approved fibre washer (2 per kit for CC22KIT & CC28KIT / 3 per kit for CC22KIT3P & CC28KIT3P)
- Stub adaptor is compatible for all jointing methods (2 per kit for CC22KIT & CC28KIT / 3 per kit for CC22KIT3P & CC28KIT3P)
- Factory fitted compression nut (supplied with equipment)
HOW TO SERVICE CLEVER COUPLER
- Carefully remove both brass insert adaptors from the equipment
- Carefully remove the o rings and remove any build up of system debris from within the grooves
- Push new o rings into the clean grooves of the insert adaptors
- Lubricate the o rings with the silicone grease provided – failure to lubricate the o rings could cause result in twisting and subsequent leakages
- Push both insert adaptors into the equipment being replaced or routinely serviced
- Insert the new fibre washers and re-tighten the equipment
Note: always replace fibre washers and o rings when replacing equipment – 22mm & 28mm service kits available
DISCLAIMER
Any changes, modifications to the brass parts or incorrect O rings / fibre washers used other than those supplied in the kits or as supplied within the service kits, will invalidate any claims being made. We take no responsibility or liability for any damages or failure arising out of, or in connection with misuse of the product.
Flushing kits must not be left in the system overnight when pressurised and the maximum duration in use under high operating temperatures must not exceed 6 hours.
Do not use any jointing compounds on the fibre washers as this may cause a chemical reaction leading to potential material breakdown.

PRODUCT TESTIMONIAL
“A problem I’ve encountered for years is having to replace a system component situated between two pipes that have no movement and being forced to cut the pipe and install a slip coupler after replacing the component. Using clever coupler has solved this problem, as I can install and remove a component without having pipe movement available. This will ensure that any future maintenance tasks can be carried out quickly and stress-free. The clever coupler has a total of 5 seals compared to the traditional nut and olive joint only having 2. The clever coupler is made using DZR brass which is less vulnerable to corrosion compared to cheaper brass fittings on the market.”

